
We know the feeling. You have spent months finalising the 3D drawings and selecting materials, but now the reality is setting in. Before our contractors can swing the first sledgehammer, you have to empty the room.
Packing up a kitchen is physically demanding. Unlike a bedroom, your kitchen is full of heavy, fragile, and oddly shaped items—from delicate bone china to heavy cast iron woks. Plus, if you live in a terrace house or a condo, you cannot simply pile everything in the hallway without causing a safety hazard.
Here is a practical, seven-day schedule to get your space site-ready without losing your mind.
Day 1 & 2: The Ruthless Edit
Do not pack what you do not use. Most Malaysian kitchens are guilty of hoarding expired spices and duplicate appliances. If you have three rice cookers or a blender that hasn’t worked since 2019, get rid of them.
Start with the "back of the cupboard" items. Check expiry dates on all dried goods. If that packet of rempah expired two years ago, bin it. Be honest about your crockery. If you are upgrading to a sleek, modern kitchen, those chipped mugs from a petrol station giveaway will look out of place. Donate them or recycle them.
Day 3: Categorise by Zone (Wet vs. Dry)
In our local layouts, we often separate the heavy cooking zone from the prep area. Pack them separately to make unpacking easier later.
Wet Kitchen Items: These are usually greasy or heavy. Scrub your woks, pots, and the underside of your heavy pans before boxing them up. You do not want old oil attracting ants while the boxes sit in storage for eight weeks.
Dry Kitchen Items: This is usually where the fragile glassware, baking equipment, and festive dinnerware live. These need extra padding.
Day 4: The Boxing Strategy
Use smaller boxes for heavy items like plates and canned food. A large box filled with porcelain plates is impossible to lift and likely to break the bottom.
Label every box clearly on the side, not the top (so you can read it when they are stacked). Be specific. Instead of writing "Kitchen," write "Dry Kitchen - Coffee Mugs & Daily Cutlery." This saves panic when you are looking for a teaspoon on the first morning after the renovation is done.
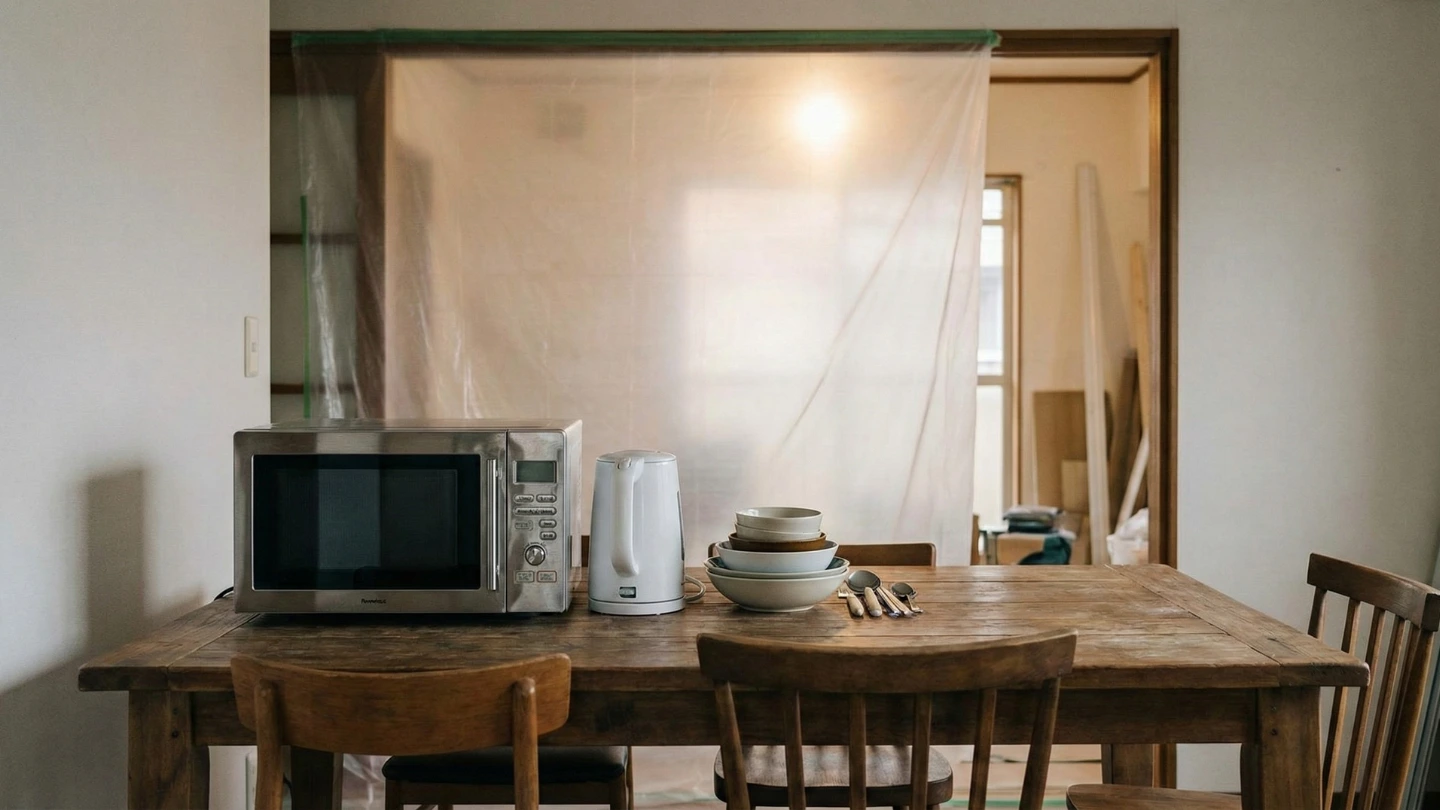
Day 5: Set Up Your Temporary Kitchen
You still need to eat while we are working. Designate a dust-free zone—usually the dining area or a spare room—to act as your temporary kitchenette.
The "Survival Kit" Checklist:
Microwave and/or induction cooker.
Kettle.
One plate, bowl, mug, and set of cutlery per family member.
Dish soap, sponge, and a small plastic basin (you will likely be washing up in the bathroom sink).
Multi-plug extension cord.
Day 6: Protection and Pathways

If you are only renovating the kitchen and not the rest of the house, you need to protect your existing finishes. While our team provides protection for the immediate work area, you should clear the path from the entrance to the kitchen.
Remove floor mats, shoe racks, or hallway consoles that might get knocked by workers carrying debris or large cabinet carcasses. If you have solid timber flooring in the hallway, consider laying down extra corrugated cardboard for peace of mind.
Day 7: The Final Disconnect
The day before the crew arrives, empty the fridge and defrost the freezer if you are moving it. If you use gas cylinders, disconnect them safely.
Designer Pro-Tip:
Take this opportunity to clean your grease trap thoroughly. Once the demolition begins, the vibration can sometimes dislodge hardened grease, causing clogs further down the pipe. It is a messy job, but doing it now prevents plumbing headaches during the fit-out.
Ready to Start?
Packing is the hard part, but the result—a kitchen tailored exactly to your cooking style—is worth it. If you are looking for a team that manages the renovation process as carefully as the design itself, let’s have a chat.